
Are you using tracking codes on your website? If so, great! Tracking activity on your website is a great way to collect information about your users, analyze performance, and find areas for improvement. This type of data is essential to developing an effective digital marketing strategy.
One way to simplify tracking data on your website is by implementing Google Tag Manager. Google Tag Manager is a free tool that allows you easily manage and update all of your tracking code snippets from one place. In this article, we’ll take a look at the basics of Google Tag Manager and how it can benefit your website.
How do I get started?
To get started with Google Tag Manager (GTM), you must first create an account. Once you setup your account, you’ll be given a code snippet to add to your website pages. Once this snippet is in place, you can then add and manage multiple tracking services within the GTM interface as opposed to within your website code. This eliminates the need to update your website every time you add or remove tracking codes.Google Tag Manager supports a variety of tracking services out of the box for quick implementation. For all other services, custom tags can be created, allowing marketers to add any tracking code necessary. Some common services that you might set up within GTM are Google Analytics, AdWords, or HubSpot.
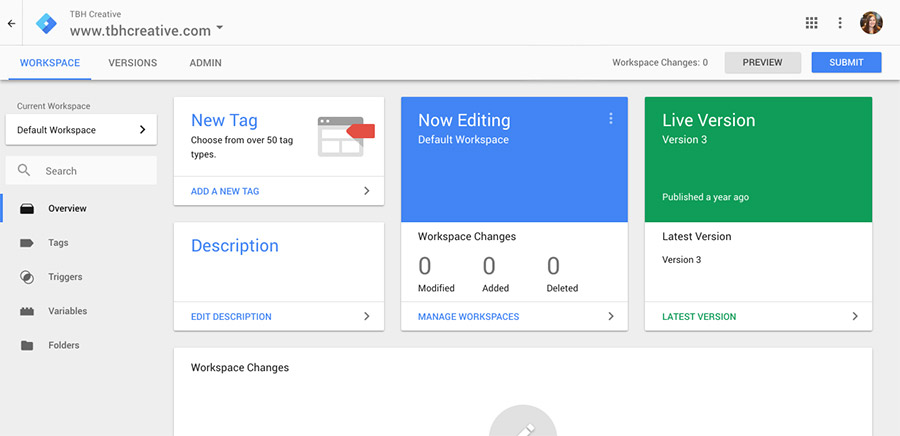
The Google Tag Manager interface makes it easy to manage your tracking codes.
What are the benefits?
It’s free! Google Tag Manager is a cost-effective way to improve your website tracking.Provides central location for all the tracking on your website. The more tracking services you have, the harder it can be to manage. By using GTM, all of this information is in one place, providing a quick overview of the data you are collecting.
Gives marketers greater control over managing tracking. Since tracking codes are managed through the GTM interface, marketers can make updates and add new tracking tools without the assistance of a developer to make changes to website code.
Saves time and money. Since marketers have more control over adding and removing tracking codes, GTM can help your business save time and money on website maintenance.
Improves website speed. GTM optimizes the way your tracking codes are deployed on your website, which results in faster loading times than when tracking codes are individually placed on your pages.
Makes testing easy. GTM has a preview mode that allows you to test what tracking codes are firing and when on your website. This makes it easier to ensure your tracking is set up properly and to troubleshoot issues.
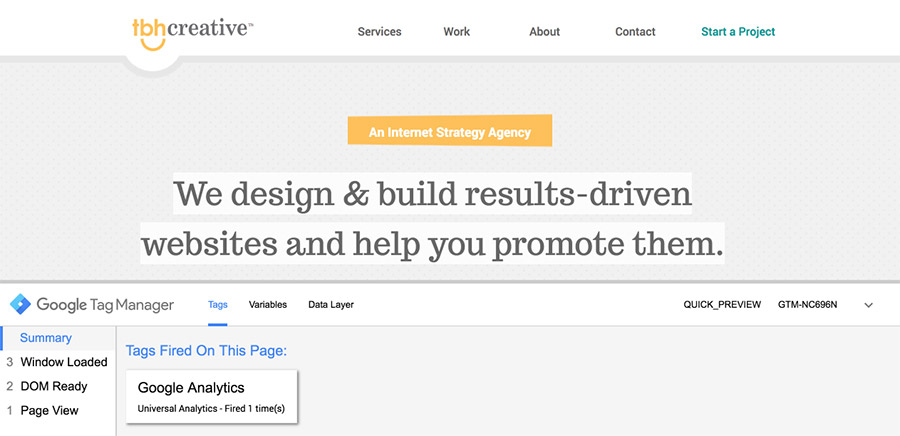
Google Tag Manager’s preview mode shows you which tags are firing on your pages for easy testing.
How do I use Google Tag Manager?
To understand how to use Google Tag Manager, you’ll need to understand its components and how they work together. It can be broken down into five pieces: containers, tags, triggers, variables, and the data layer.Containers. The first step to setting up GTM on your website is to create a container, which is the top-level component that will hold all of your tags. Once your container is created, the snippet of code that you’ll add to your website will be generated. The container code snippet should replace any tracking codes currently on your website that you will be moving into Google Tag Manager.
Tags. A tag is what contains the snippet of code that will execute on your website. For each tracking code you want to add, you’ll create a new tag. This takes the place of adding code directly to your website each time a new tracking code needs implemented.
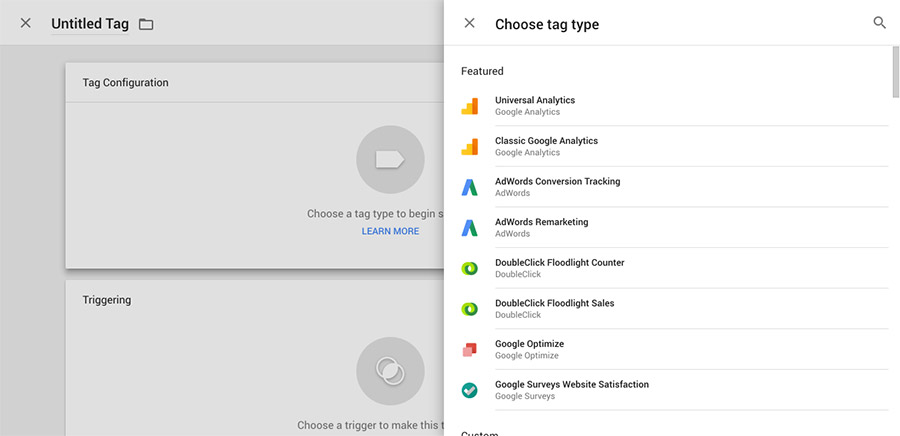
Google Tag Manager provides easy setup for common tracking codes.
Triggers. You can create triggers to control exactly when your tags are executed on your website. Triggers can be used to initiate tags only at a specified time or after a specific event, and every tag needs at least one trigger. For example, you might have a trigger that will only initiate a tag when a button is clicked. Or, you might just use the basic “all pages” trigger, which would execute your tag on all pages when the page is loaded.
Variables. Variables can be defined within GTM for use in triggers or tags as needed. There are a number of predefined variables that are generated by default, such as page URL or container ID, but you can create your own variables in addition to these. How you use variables will depend on factors such as what data you are tracking and the triggers needed for your website.
Data Layer. A data layer can be used to collect data from your website and pass it to Google Tag Manager. This requires adding additional code to your website along with your container code snippet. A data layer is beneficial if you are creating more advanced variables that require access to information from your website.
Once all of these pieces are in place, you’re ready to start collecting data on your website. Overall, Google Tag Manager makes it simple and more manageable to track data and pass it to a variety of services. It’s a valuable addition to any digital marketing strategy and can be beneficial in streamlining your workflow. Give it a try!
Want more information?
Check out the links below to dig deeper into Google Tag Manager.- Google Tag Manager help section
- Google Tag Manager Developer Guide
- iPullRank’s Google Tag Manager Guide
We would love to hear about your project & ways we can help