Photographs are an essential piece to a business’s website.
They allow you to actually show what you do instead of your clients reading about it. For the typical end user, a visual portfolio has more impact than a well descriptive paragraph. With photos being so critical comes the question what kind of photos do you use? There are two answers to this question, either take your own photos or buy stock photos. Of these two answers, which one is better? Let’s take a look…
Stock Photos
Stock photography is a common source for website graphics and it is easy to find photos that pertain to most any business via search options. Most popular stock photo websites include iStockPhoto, ShutterStock, and Fotolia among many others. Some of these sites are free and some of them have you buy credit for their photos, but they are all professional photos and there are a lot to choose from.
One problem with using stock photos is that anyone can use them.
Your business could end up with a photo that your competitor is using on their website. This makes your website seem unoriginal from using photos that your clients have already seen somewhere else.

Yet there is nothing wrong with using stock photography, but it might be more beneficial to try to take your own or hire someone to take some for you.
Your Own Photos
Taking your own photos gives you the ability to create what you want your clients to see. It will be unique because you took it, so no one else will have it. Nicely said by D. A. Shaver “…these are pictures for a purpose; not for art”. You need these photos on your website for a purpose, not to fill space on your website.
It’s better for you to take control and find what you would like to be that purpose for your business and photograph it. Shaver’s blog gives some great advice on how to take great pictures for you website. What if these photos don’t turn out to look professional or anything like the stock photos?
Well there are many tutorials out there to help edit your photos to make them look professional. Some of them could take more time than others, but in the end it is worth it when you have a completely original website and photos.
Photo Retouching Tutorials
Useful Photoshop Tips And Tricks For Photo Retouching – By Smashing Magazine

This blog lists a number of tutorials including the example above which explains how to adjust the levels of the photo decrease color tints. This blog also includes a tutorial for adding natural increased light, changing skin tones, and reducing noise.
Photo Retouching Tips and Tricks in Photoshop – by Smashing Magazine

Another blog by Smashing Magazine lists even more touch up techniques like the example above, creating bright eyes with exposure. This blog also includes some tutorials on matching skin tones and defining colors.
35 Fantastic Photo Retouching Tutorials – by Noupe

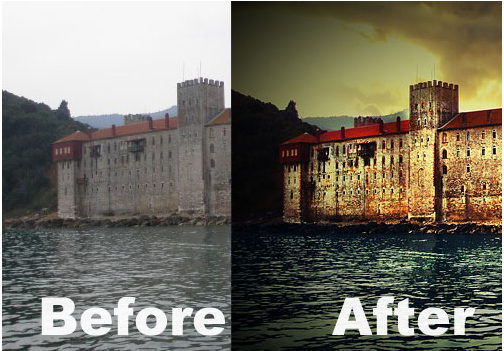
This blog by Noupe gives some quick and easy tutorials to adjust your photos, including this tutorial on how to make your landscape photo less dull and boring. It also has a useful tutorial on how to reduce wrinkles as well as adding color to a black and white photo and how to reduce blemishes with the clone tool.
Summary
With these tutorials you can create original professional photos for your website. If you don’t have the time to take these photos and to retouch them, stock photos are always an option. Just remember that there is a risk when buying stock photos — someone else probably already bought it for their website. If you don’t have the time, go ahead and use it. But if you do have time, we encourage you to take your own, unique and special images that will only be used on your website.
If you don’t think that you can come up with your own creative photos, TBH Creative can help and provide an evaluation of your website with a web consultation.

